



Tabla de contenido
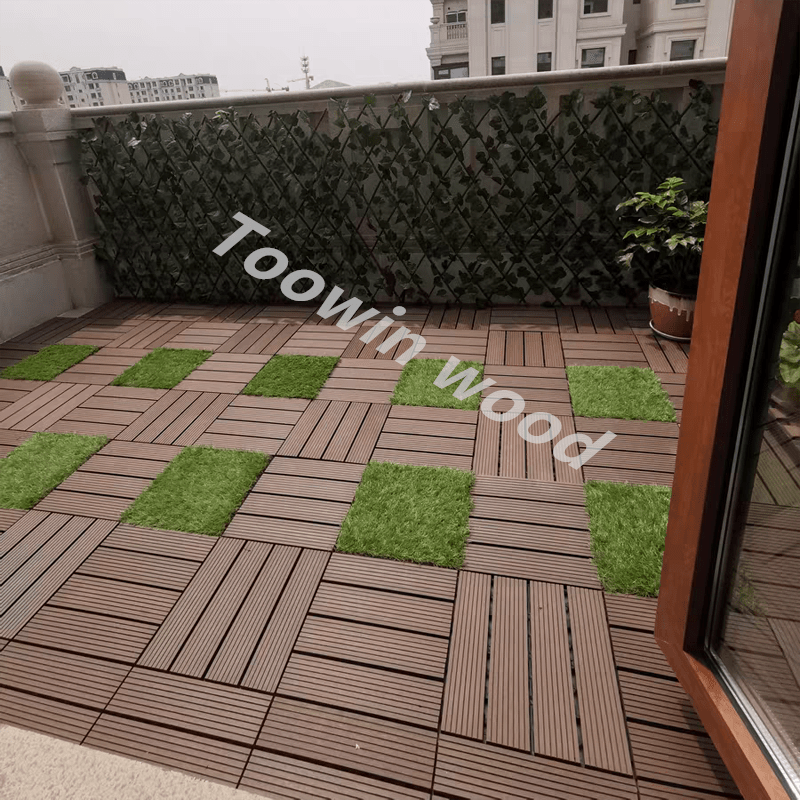
Transforming an outdoor space—whether it is a sprawling backyard patio, a cozy apartment balcony, or a chic rooftop terrace—has never been more accessible. For homeowners and renters alike, the desire to elevate outdoor aesthetics without the grueling labor of traditional carpentry has led to incredible innovations in building materials. At the forefront of this DIY revolution is Wood Plastic Composite (WPC). If you are looking to revamp your exterior flooring, understanding the fundamentals of wpc deck tile installation can save you thousands of dollars in contractor fees while delivering a premium, resort-like finish.
1. Outdoor Living and Flooring Solutions
In recent years, the concept of the “outdoor living room” has taken center stage in home design. People are no longer satisfied with bare concrete slabs or splintering wooden planks. They want seamless transitions from their indoor living rooms to their outdoor spaces. However, traditional wood decking comes with a host of challenges: it requires heavy machinery to cut, complicated sub-frame structures to support, and endless hours of sanding, staining, and sealing to maintain.
Enter the modern era of modular flooring. By opting for a quick install wpc deck flooring solution, you bypass the need for joists, screws, and hidden fasteners. These tiles are designed for the modern consumer—someone who values both high-end aesthetics and weekend-friendly projects.
2. What Exactly is WPC?

Before diving into the installation steps, it is important to understand what you are working with. WPC stands for Wood Plastic Composite. It is a highly engineered material created by combining recycled wood fibers (like sawdust and wood chips) with recycled plastics (such as high-density polyethylene, or HDPE).
These raw materials are mixed with bonding agents, UV stabilizers, and color pigments, then heated and extruded into the shape of traditional wood boards. In the case of tiles, these composite boards are cut into smaller sections and permanently attached to a specialized plastic grid base.
The resulting material offers the best of both worlds: the natural, warm appearance of real timber and the waterproof, rot-resistant durability of synthetic plastic.
3. Why Choose WPC Deck Tiles?
If you are on the fence about which material to choose for your patio or balcony, here is a breakdown of why an interlocking deck wpc tile is often the superior choice for DIY enthusiasts:
- Ecológico: Because they are made from recycled wood and plastics, WPC tiles prevent millions of tons of waste from entering landfills each year.
- Weather and Rot Resistance: Unlike natural wood, composite does not absorb moisture easily. This makes it highly resistant to rot, mold, mildew, and insect infestations (like termites).
- Zero Splintering: WPC provides a smooth, uniform surface that is safe for bare feet, children, and pets.
- Bajo mantenimiento: Say goodbye to annual sanding, painting, and staining. WPC requires only basic cleaning to look brand new.
- Renter-Friendly: Because the tiles float over the existing surface without the need for adhesives or screws, they can be easily uninstalled and taken with you when you move.
4. Pre-Installation Preparation
The secret to a flawless, long-lasting deck lies in the preparation. Even the highest quality materials will fail if the foundation is compromised.
Step 4.1: Gathering Your Tools
One of the greatest benefits of this project is the minimal tool requirement. You likely already have most of these items in your garage.
| Tool / Material | Purpose in Installation | Necessity Level |
| Tape Measure | For calculating square footage and planning cuts. | Essential |
| Chalk Line / Pencil | To mark straight lines on tiles for cutting. | Essential |
| Rubber Mallet | To gently tap interlocking tabs into place without damaging the composite surface. | Recommended |
| Jigsaw or Circular Saw | For cutting tiles to fit around edges, corners, or obstacles like pipes. | Essential (if cuts are needed) |
| Safety Goggles & Mask | To protect your eyes and lungs from fine composite dust during cutting. | Essential |
| Sandpaper / Metal File | To smooth out any rough edges after making cuts. | Recommended |
| Knee Pads | To protect your knees during hours of floor-level work. | Optional but highly recommended |
Step 4.2: Assessing and Preparing the Surface
WPC deck tiles are designed to be laid over a solid, flat, and well-draining surface. They are not structural elements; they are decorative overlays.
- Concrete Patios and Balconies: This is the ideal surface. Ensure the concrete is swept clean of debris. If there are massive cracks or uneven spots, consider using a self-leveling concrete patch compound before starting.
- Existing Wooden Decks: You can lay tiles directly over an old deck, provided the underlying wood is structurally sound and not rotting. Ensure there are no raised nails or screws that could puncture the plastic bases of the tiles.
- Gravel or Dirt: It is not recommended to lay interlocking tiles directly on loose dirt or thick grass, as the ground will shift and cause the locking mechanisms to break. If you must install over ground, you must first create a compacted base of crushed gravel and sand, topped with a weed barrier fabric, making sure it is perfectly leveled.
Step 4.3: Acclimation
This is a step many beginners skip, much to their detriment. Wood Plastic Composite expands and contracts with changes in temperature. Once your boxes of tiles arrive, open them and spread the tiles out in the area where they will be installed. Allow them to sit for 24 to 48 hours. This allows the material to adapt to the local humidity and temperature, minimizing the risk of warping or buckling after installation.
5. The Step-by-Step Installation Guide
With your tools gathered and your surface prepped and leveled, you are ready to begin the wpc deck tile installation. Take your time, plan your layout, and enjoy the process.
Step 1: Plan Your Starting Point
Do not just start throwing tiles down in the middle of the yard. Identify the longest, straightest wall or edge of your installation area. This will be your starting line. If you are installing on a balcony with a prominent glass railing, you usually want to start at the railing edge so that the full, uncut tiles are the most visible, pushing any necessary cut tiles to the back wall.
Step 2: Lay the First Tile
Place your first tile in the chosen corner. Notice the plastic grid underneath the composite slats. Two sides of the tile will have plastic loops (female connectors), and the other two sides will have plastic pegs (male connectors). Orient the tile so that the pegs are facing outward toward the open space where you will lay the next tiles.
Step 3: Connect the Next Tiles
Take your second tile and line up its female loops with the male pegs of the first tile. Press down firmly. You should hear and feel a satisfying “click” as the pieces lock together. If you are struggling to push them down by hand, use your rubber mallet to gently tap the seams. Continue this process, building out a single row along your starting wall.
Step 4: Expand the Grid
Once your first row is established, begin the second row. Work your way outward in a stepped, diagonal pattern rather than building single long rows. This helps keep the entire grid square and prevents alignment issues from compounding over a large area. Because it is a quick install wpc deck flooring system, you will find that a standard 10×10 foot patio can be fully covered in less than two hours of continuous work.
Step 5: Cutting to Fit (The Edge Work)
Eventually, you will reach the opposite wall, a corner, or an obstacle like a drainage pipe or a structural pillar. Standard tiles will not fit here, so you must cut them.
- Measure the gap between your last full tile and the wall.
- Subtract a quarter-inch (about 5-10mm) to leave an expansion gap. WPC needs room to breathe; if you jam the tiles tight against a wall, they will buckle when the summer heat causes them to expand.
- Mark your measurement on the back (the plastic grid side) of the tile.
- Using a jigsaw with a fine-tooth blade, slowly cut through the plastic and the composite. Wear your safety mask!
- Snap the cut piece into place. If the cut edge is rough, hit it briefly with medium-grit sandpaper.
Step 6: Finishing the Edges (Optional)
If your deck does not end at a wall and has an exposed edge (like a step down into a garden), the exposed plastic connecting tabs can look unsightly. Most manufacturers sell matching sloping edge trims or fascia pieces that click directly into the exposed loops or pegs, providing a clean, ramped transition to the ground.
6. Customizing Your Space: Layout Patterns
One of the most enjoyable aspects of using an interlocking deck wpc tile is the geometric flexibility it provides. Because the tiles are perfectly square, you can rotate them to create distinct visual patterns without any extra cutting or effort.
Here are the most popular layout styles you can achieve simply by rotating the tiles during step 3:
| Pattern Name | Descripción | Best For |
| Straight / Parallel | All composite slats run in the exact same direction. | Elongating small, narrow spaces like tight apartment balconies. |
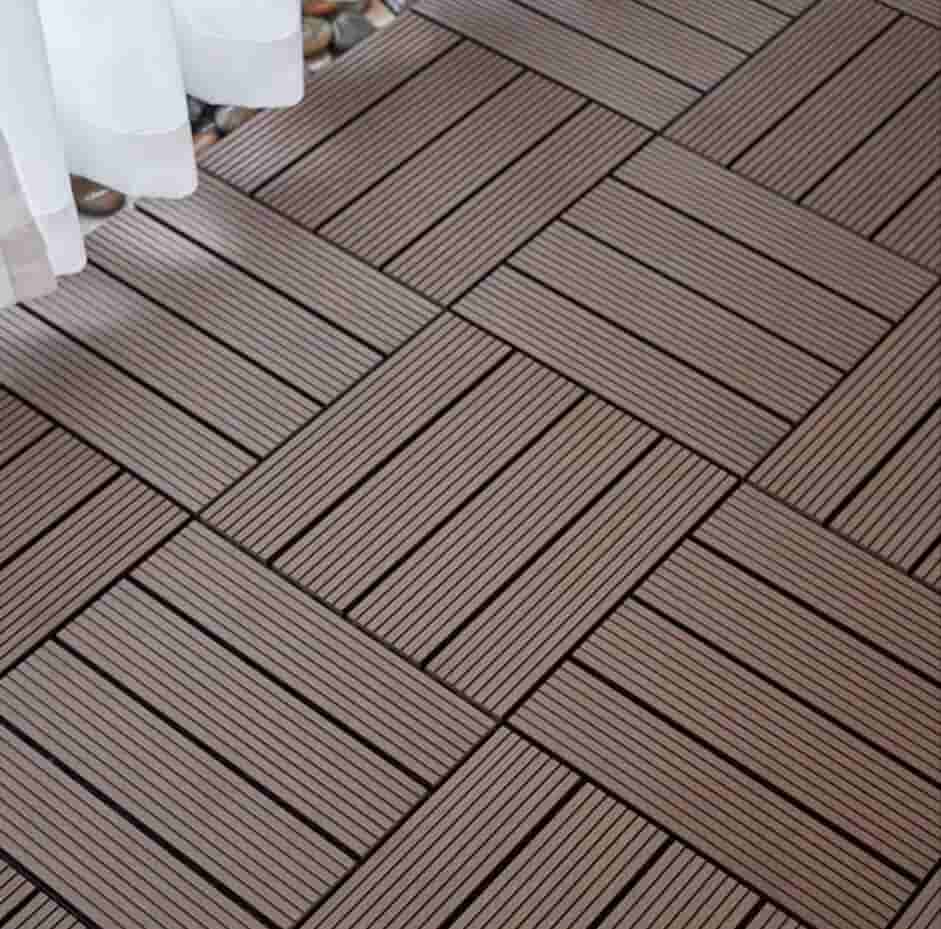
| Checkerboard | Tiles alternate direction by 90 degrees, creating a woven, chessboard effect. | Large, open patios. It hides slight imperfections in squareness and adds visual texture. |
| Framed / Border | The main body of the deck uses one pattern or color, while the outer edge uses a different color or orientation. | Defining specific zones, like framing a fire pit or outdoor dining table area. |
| Staggered Brick | Requires specific rectangular tile variants, mimicking a traditional brick wall layout. | Classic, architectural aesthetics to match brick homes. |
7. Long-Term Maintenance and Care
Congratulations! Your installation is complete. While WPC is famously low-maintenance, it is not completely “no-maintenance.” To ensure your deck looks pristine for the next decade, follow these simple care guidelines:
Limpieza rutinaria:
Sweep the deck weekly to prevent dirt, leaves, and pine needles from accumulating. If organic matter is left wet on the deck for weeks, it can eventually cause surface mold. Every few months, give the deck a thorough wash using a standard hose, a soft-bristle brush, and mild dish soap.
Dealing with Stains:
WPC is highly resistant to staining, but oil and grease (common culprits around outdoor BBQ grills) can leave marks if not addressed quickly. If you drop a greasy sausage or spill olive oil, wipe it up immediately and wash the area with a degreasing dish soap and warm water.
Winterizing:
Composite tiles handle freezing temperatures beautifully. However, if it snows, do not use a metal shovel to clear your patio, as the sharp metal edge can gouge and scratch the composite surface. Use a plastic-edged shovel or a stiff broom. Avoid using harsh rock salt (calcium chloride) directly on the tiles, as it can leave a white residue that is difficult to wash off. Opt for pet-safe, composite-safe ice melts instead.
Underneath the Deck:
Because the tiles feature a raised plastic grid, water flows freely underneath them to your existing drainage points. However, over time, fine dirt and dog hair can accumulate under the tiles. Once a year (usually in spring), it is a good idea to unclick a few tiles in the areas where water naturally pools to vacuum out any accumulated debris, ensuring your drainage remains unobstructed.
8. Conclusion
Upgrading your outdoor living area does not have to be a stressful, multi-week construction project requiring specialized contractors. By utilizing modular composite materials, you are empowering yourself to transform your home in a single weekend. The process is forgiving, the tools required are minimal, and the results are nothing short of professional. Measure carefully, acclimate your materials, leave proper expansion gaps, and you will enjoy a beautiful, durable, and bare-foot-friendly outdoor sanctuary for years to come.
Acerca del autor
WPC Deck Tile Technical Director – Tony
Responsible for technical support to the sales team, with expertise in production, processing, installation, design and R&D of new products.
Preguntas frecuentes
Can WPC deck tiles be placed directly on grass or dirt?
No, it is highly discouraged. WPC tiles require a hard, flat, and stable surface to function properly. If placed on soft dirt or uneven grass, the weight of foot traffic will cause the plastic interlocking mechanisms beneath the tiles to snap. If you want to install them over a grassy area, you must first dig out the topsoil, lay down a weed barrier, and create a compacted, level base of gravel and builder’s sand.
How do I clean WPC deck tiles, and can I use a pressure washer?
For general cleaning, sweeping and mopping with warm water and a mild, non-bleach soap is sufficient. You poder use a pressure washer for deep cleaning, but you must be extremely careful. Keep the pressure below 1500 PSI, use a wide fan-tip nozzle, and maintain a distance of at least 12 inches from the surface. Concentrated, high-pressure water can damage the textured wood-grain finish of the composite.
Will WPC deck tiles fade in direct sunlight over time?
High-quality WPC tiles are manufactured with UV inhibitors that significantly slow down the fading process. However, any material left in direct, baking sunlight will experience some degree of weathering. You may notice a very slight lightening of the color during the first three to six months (known as weathering), after which the color will stabilize. They will not turn gray or rot like untreated natural wood.